Applies to: FiveM on the Gravel Host Panel · Time: about 20 minutes · Difficulty: Intermediate
txAdmin is a free web panel for managing and monitoring your FiveM server. This guide turns it on, runs its setup and connects it to a database from the panel.
¶ Before you start
- A FiveM server with Gravel Host. No server yet? Get one here
- Prefer video? Watch the txAdmin setup video tutorial.
¶ Steps
¶ Enable txAdmin in the panel
- In the Gravel Host Game Panel, open the Network section and click Create Allocation.
- Copy the new port that appears under your Primary.

- Register a new license key at https://keymaster.fivem.net/.
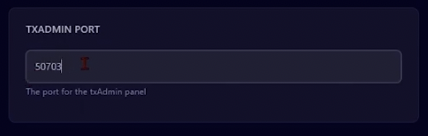
- Open the Startup tab and paste the new port into the TXADMIN PORT field.
- In the ENABLE TXADMIN field, replace the
0with a1. - Paste your license key into the FIVEM LICENSE field.
- Go to the Console page and start your server.
¶ Run the txAdmin setup
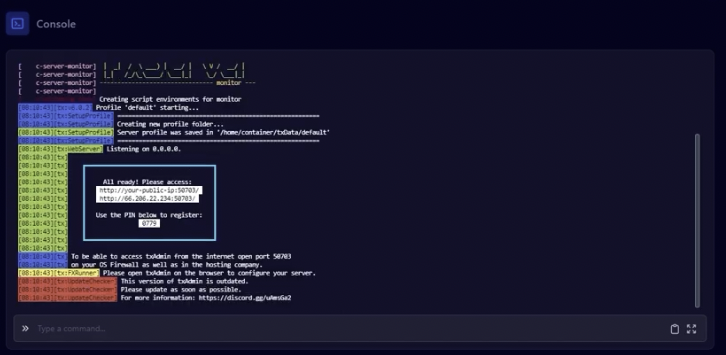
- Copy the link from the console and open it in your browser. Enter the PIN when asked.
- On txAdmin's site, create your password, then set your server name, deployment type and template.
- Click Next. In the Input Parameters menu, paste your Keymaster license key and click to show the database options.
¶ Connect a database
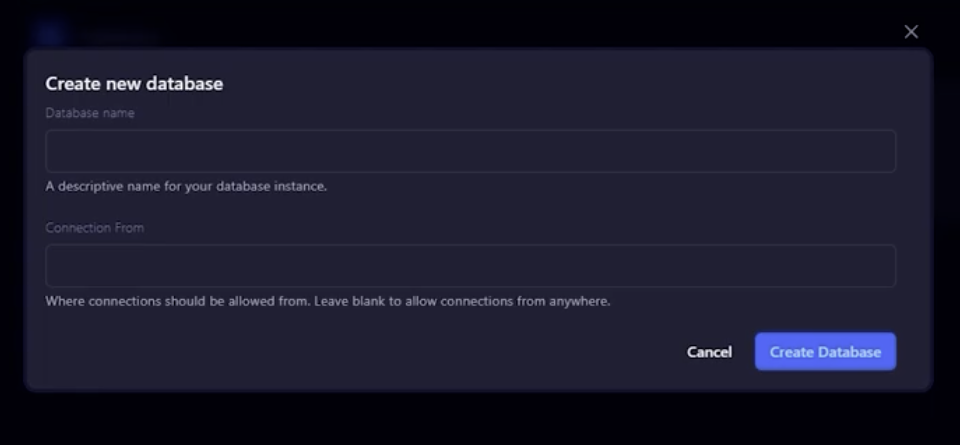
- In the Gravel Host game panel, open the Databases section.
- Create a new database and leave the fields blank.
- Copy your new database information into the matching fields in txAdmin.
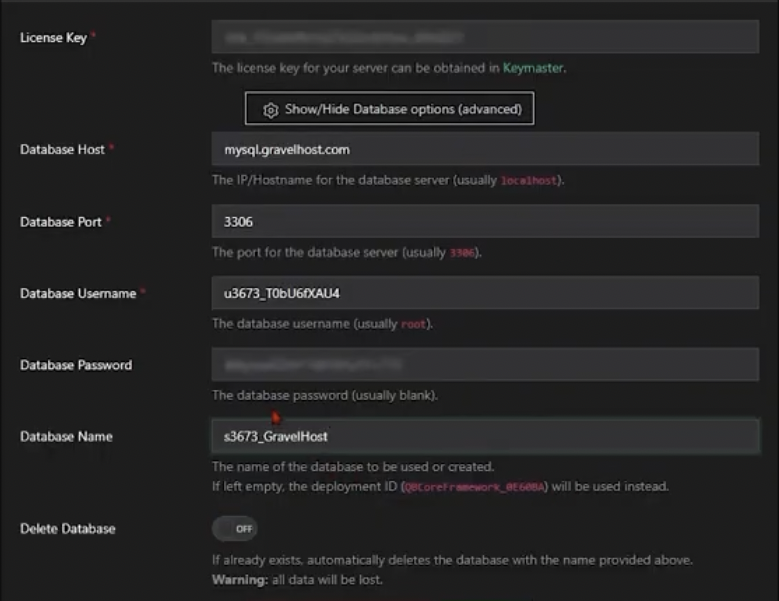
Recommended: Select the Delete Database option if you want txAdmin to fully manage your database.
¶ Finish the install
- When the installation on txAdmin's site is complete, copy your primary IP from the panel Dashboard.
- Paste it into lines 15 and 16 of the config on txAdmin's site.
- Click Save & Run Server.
¶ Check it worked
The server starts from txAdmin, and txAdmin is now fully installed and working.
¶ Troubleshooting
¶ A problem inside txAdmin itself
For txAdmin-specific support, contact the txAdmin team through https://txadm.in/ or their Discord.
¶ Related guides
- How to Use the txAdmin Interface on Your FiveM Server
- How to Update txAdmin on Your FiveM Server
- How to Add a License Key to Your FiveM Server
Still stuck? Our team is on Discord, or open a ticket from the Billing Panel.